Browsing Category

Makeover

In Makeover

Affection for Copper

Of all the metals, I think I love Copper the most.  What about you? Do you have a favourite metal?

copper fusion

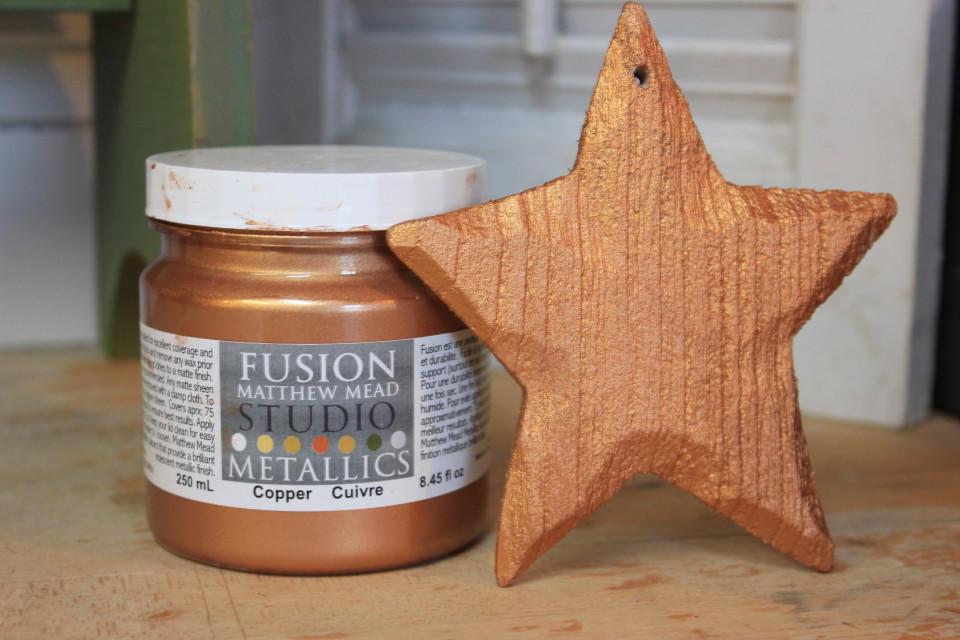
Rosemary from Onslow Historic Lumber asked if I would be interested in trying some of the new Fusion Matthew Mead Studio Metallic, and I jumped on the chance.  I had tried the Fusion Mineral Paint before but not the Metallic.  I was excited to try it!  All the project I had seen online were so fabulous!
copper fusion

I had a couple projects in mind, I wanted to stencil with it but I wanted to flat out paint something, too.  I wanted to see how well it covered on metal and paint.  I apologize to Mr. Byrne, if you are looking for the handle for the basement hatch….it is no longer white…..it’s copper….you’re welcome! 🙂
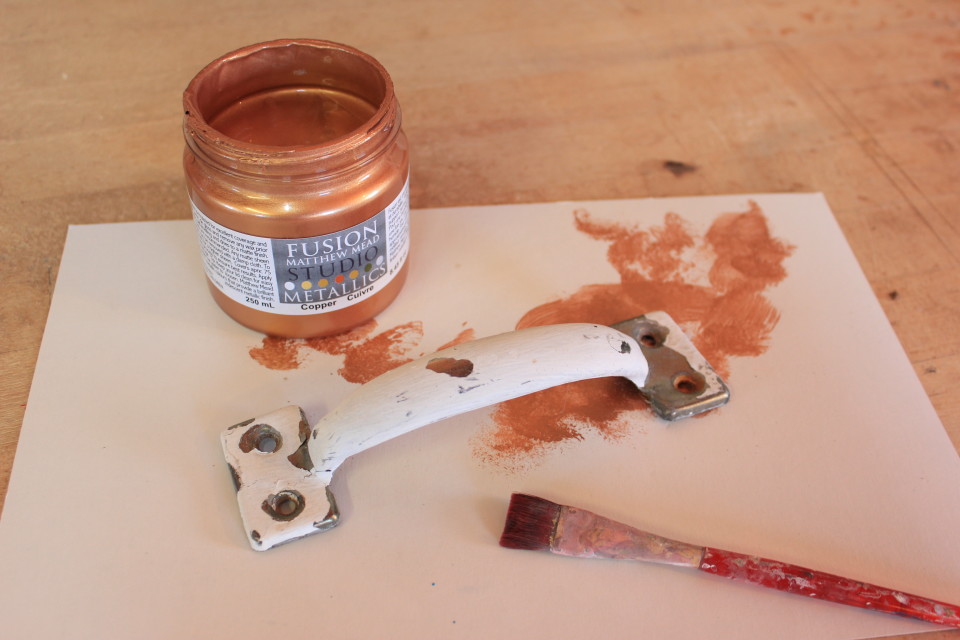
copper fusion

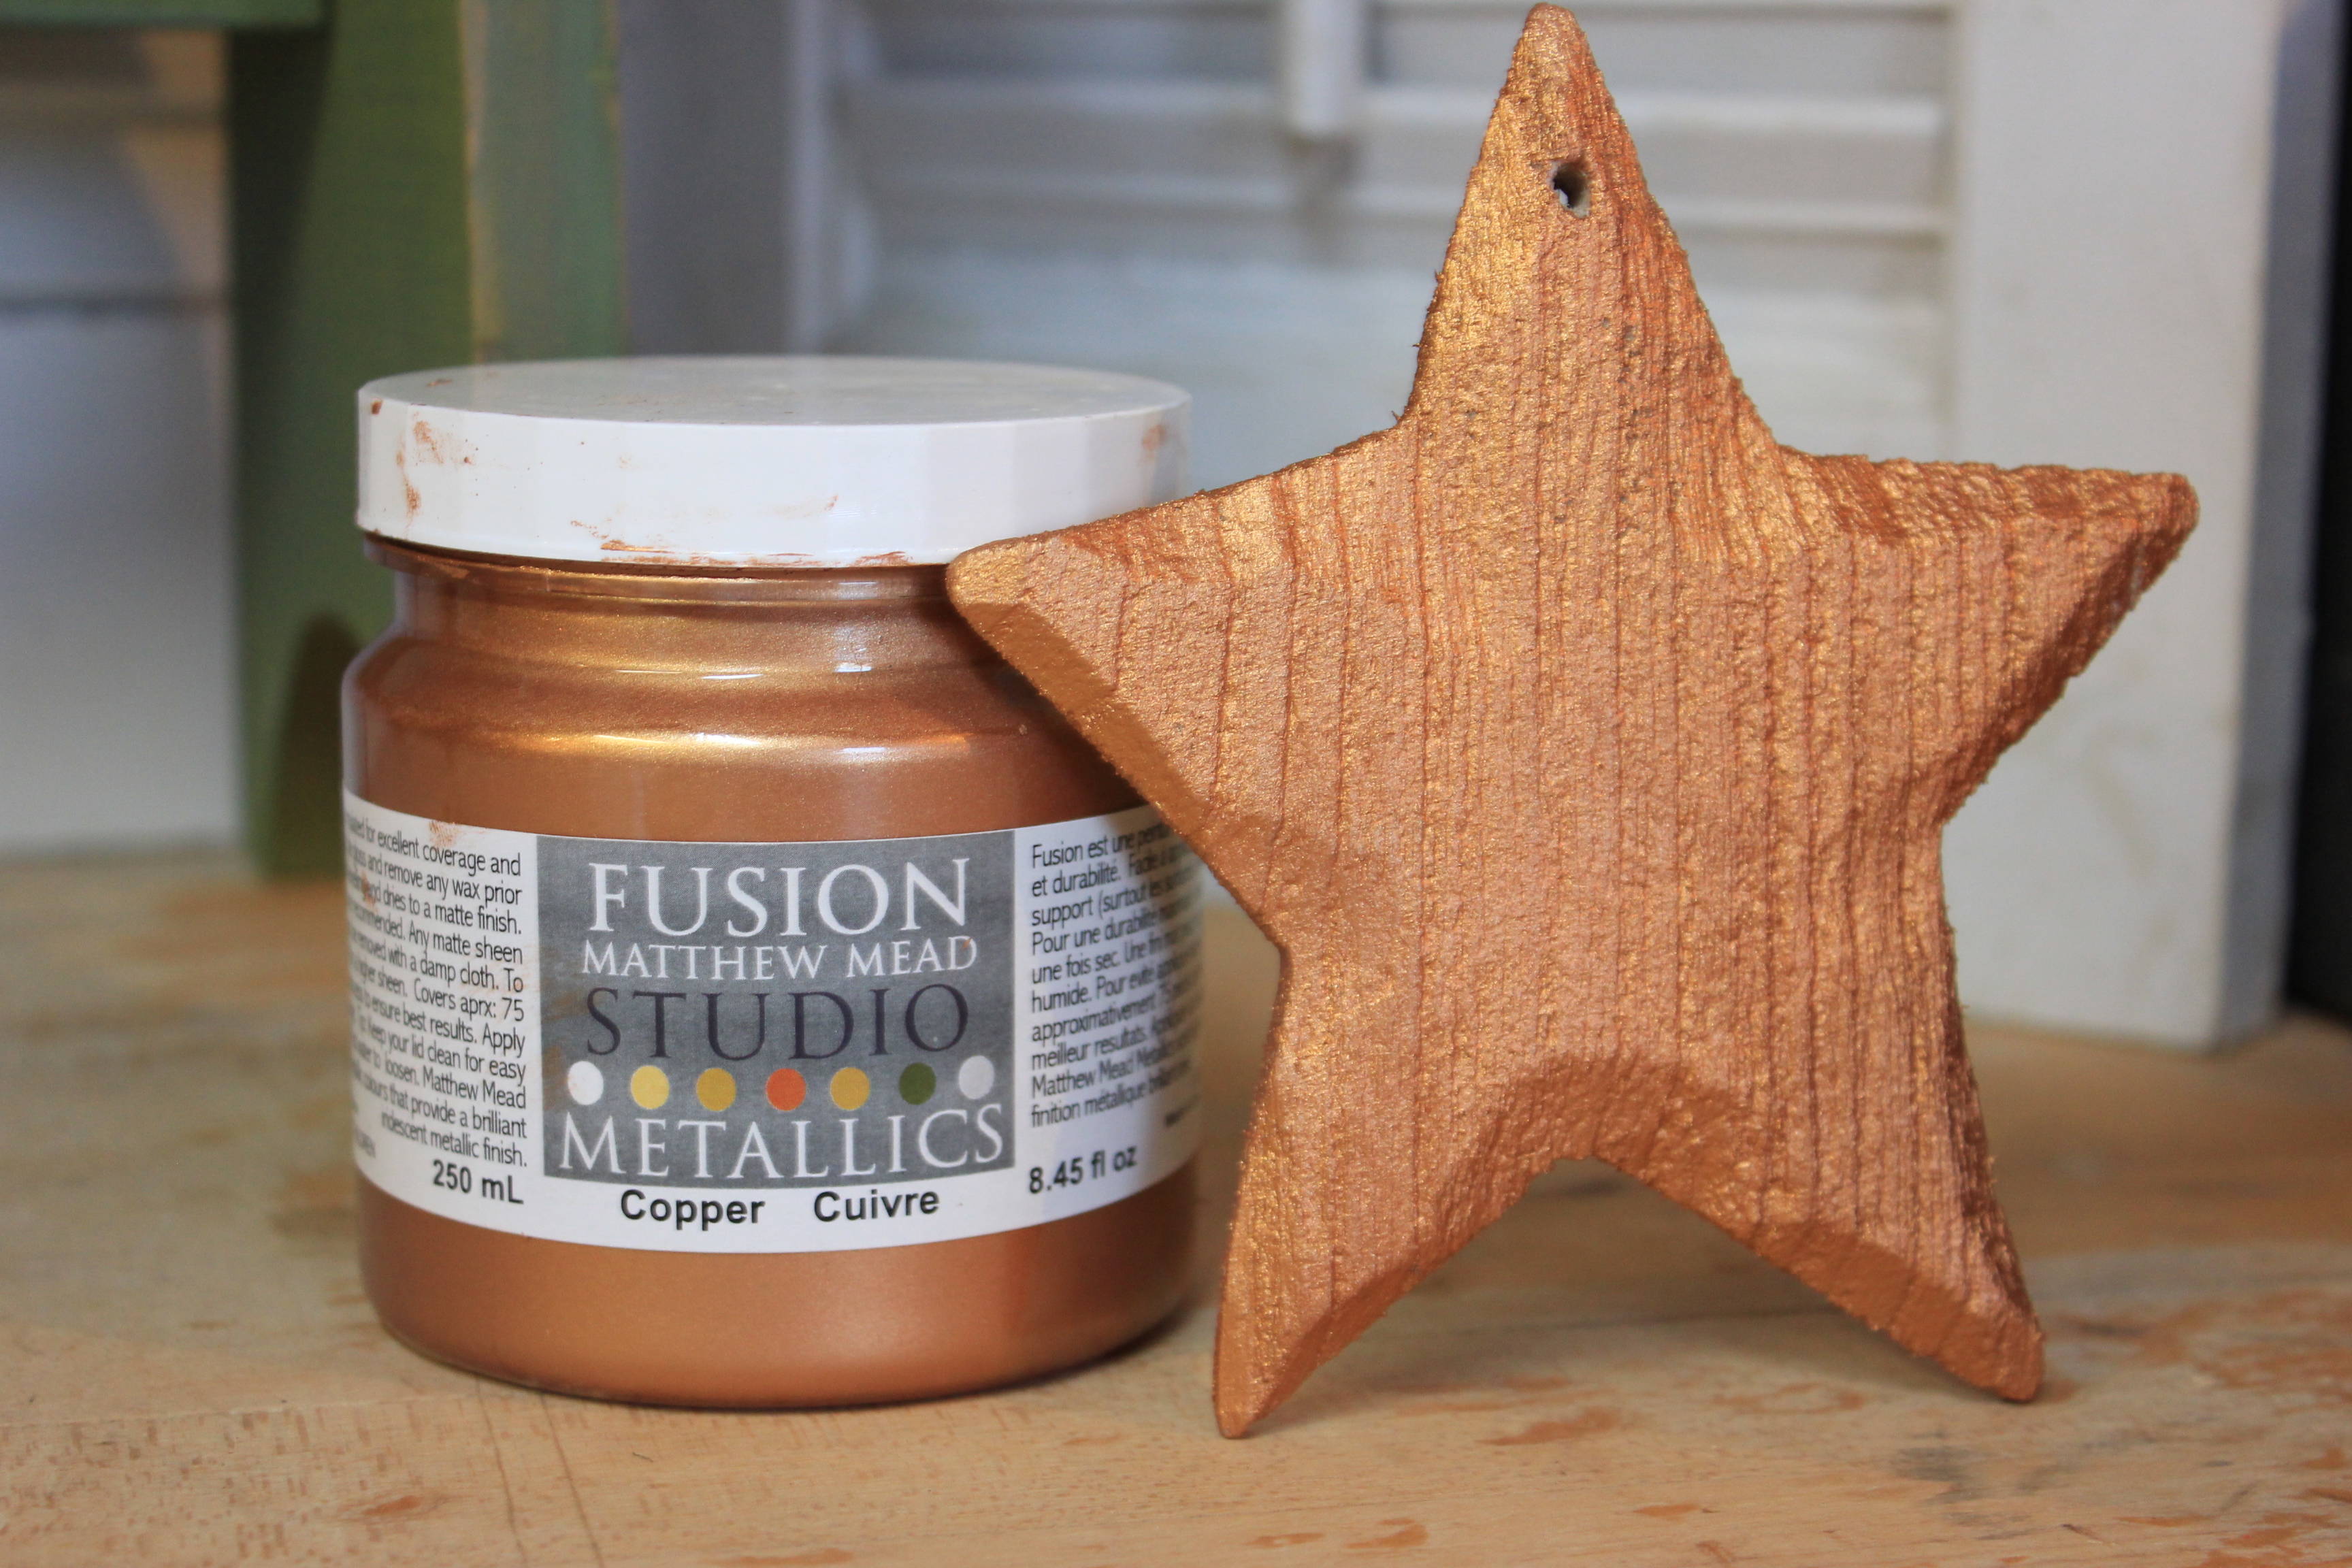
It is so dreamy and smooth going on!  I tried it on the wooden star and it covered very well.  I was wondering about the adhesion on metal and I had a random house number that wasn’t being used for anything, so I grabbed it, too. Honestly, nothing was safe from me and the pot of Copper Fusion!  Two coats on anything covered like a dream!  I think if I had paid more attention, I’m sure I could’ve gotten away with one coat.
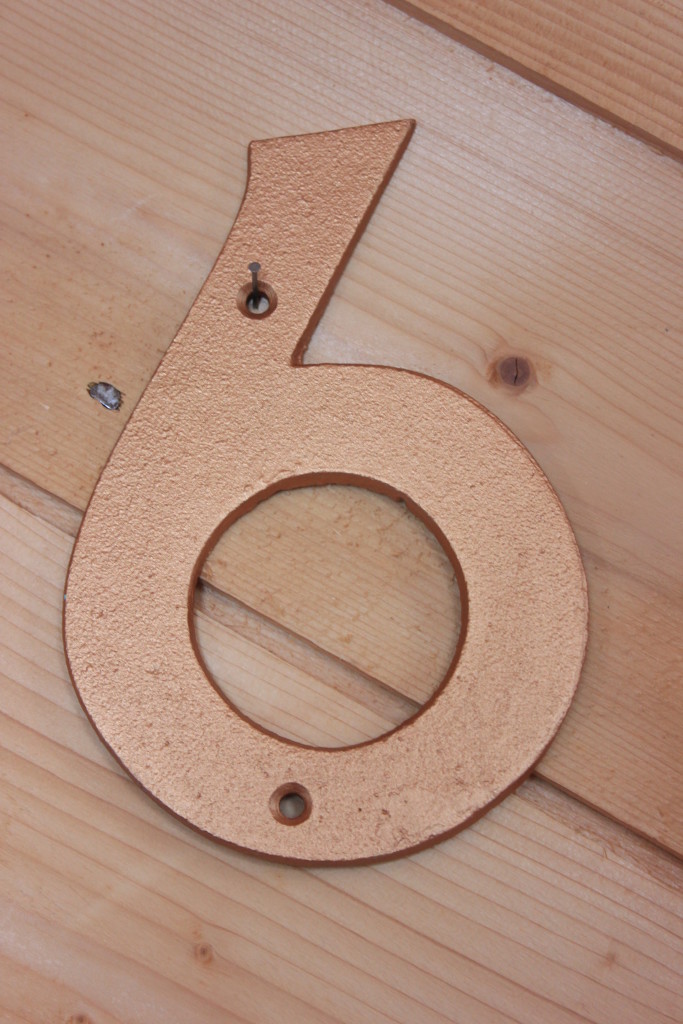
copper fusion

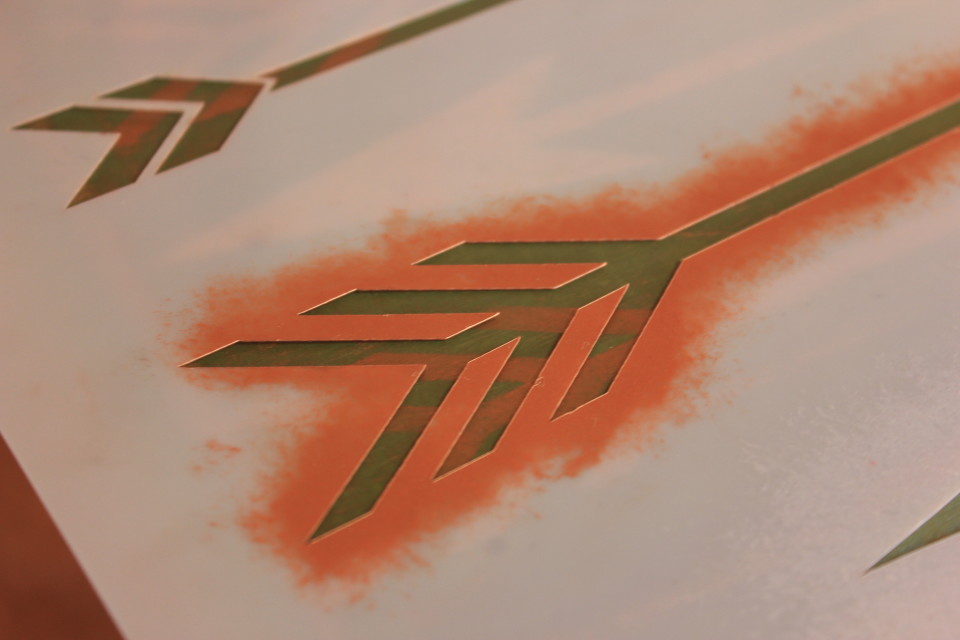
I love the Metallic Fusion with the stencils, too.  I love the softness that stenciling gives to the Copper.  It’s more subtle when applied in the thin layer that stenciling achieves.  But still has just enough shimmer to dress the painted piece up.  Plus, the arrow stencil is just plain awesome!  { This stool is the last one I have and it could be yours!!  Let me know if you’re are interested! }
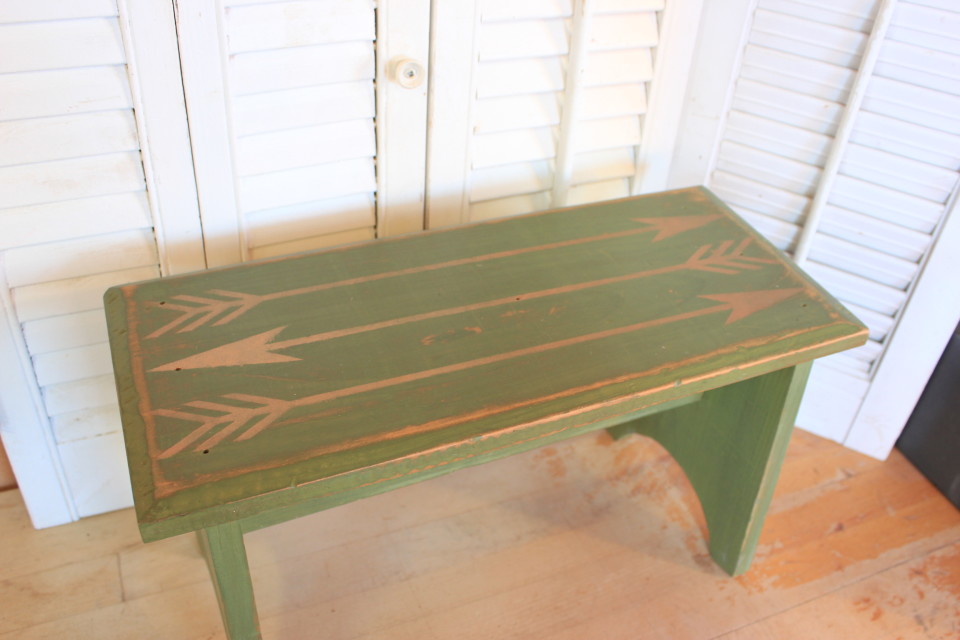
copper fusioncopper fusion

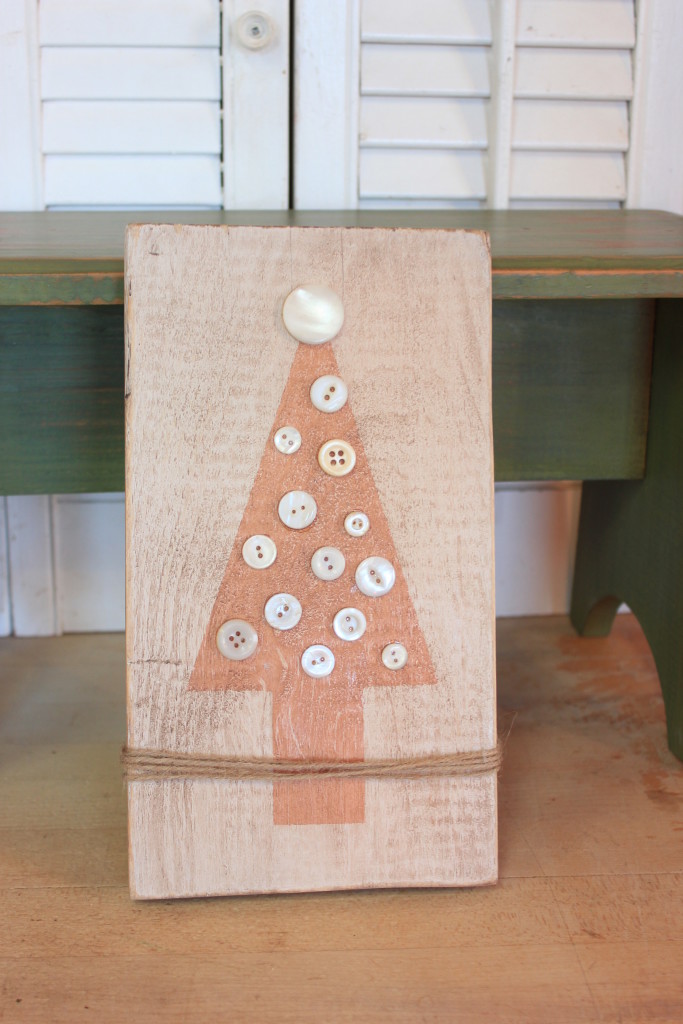
My little Button Tree is the right mix of festive and rustic!  This tree was just taped off and then I stenciled inside the tape. When it was dry, I did a little sanding and then used some antiquing wax to add some more dimension.   I hadn’t used the right glue on it the first time and I would lose buttons at random but now they are staying where they belong!  Always such a learning curve, sheesh!
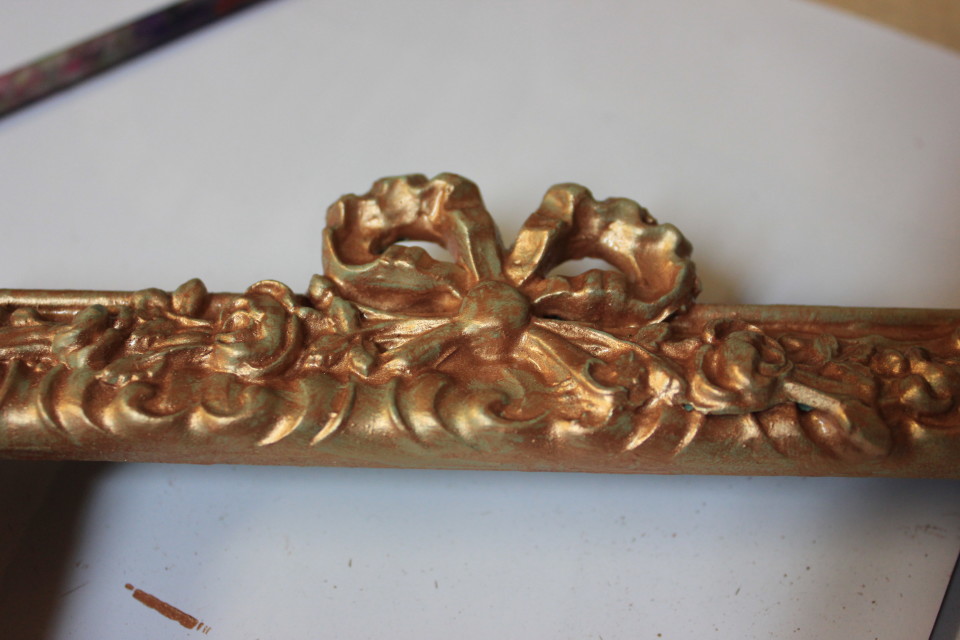
copper fusion

Like I said, nothing was safe…..I had painted this frame awhile ago but wasn’t sold on the solid green.  And so it sat….until I thought that a copper wash over it would be fitting.  So I painted on the copper and then with a damp rug, rubbed some of the paint off.  It really gives it the verde gris look which I love! I haven’t found a home for it yet nor a picture to put inside, but I’m really pleased with the over-all look of the copper over the green.

All in all, I love working with the Copper Metallic.  It is very easy to work with and can really be used in so many different ways.  I’d like to paint a chair a solid chair and ‘dip’ the legs in metallic….I’m sure I have a spare chair somewhere that I could do that with…future blog post?  I think so….

Special thanks to Onslow for putting some in my hand to try and review!  This has been brought to you by Onslow Historic Lumber, a company I proudly stand behind, but the opinions and messy studio are all my own.  🙂

To be continued,

Lori


1 In Makeover

Oak Desk Chair Makeover

There are days I have to admit I amaze even myself.  Quite the lead in, eh? Especially on a makeover post!  But, guys, I’m so incredibly pleased with how this chair turned out!

I have this awesome client who I have done a fair amount of painted pieces for.  So when she sent me another text asking if I was up for the challenge, I couldn’t say no!  Every project to date has been exciting, satisfying and well, awesome!  I love that I’m her go-to girl for these projects and that she has the patience to let me work on them at my pace….sometimes things take longer to complete than I think they will.  Sometimes the regular busyness of life, sometimes pulling tacks takes WAAAAAAAY longer than I think!

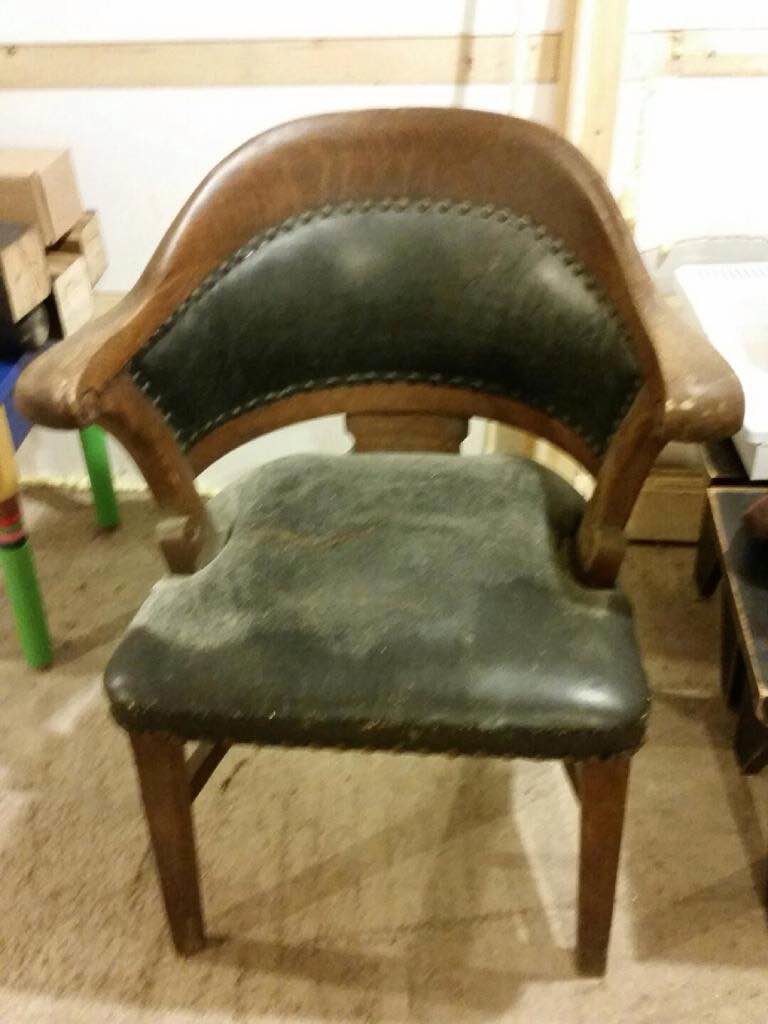
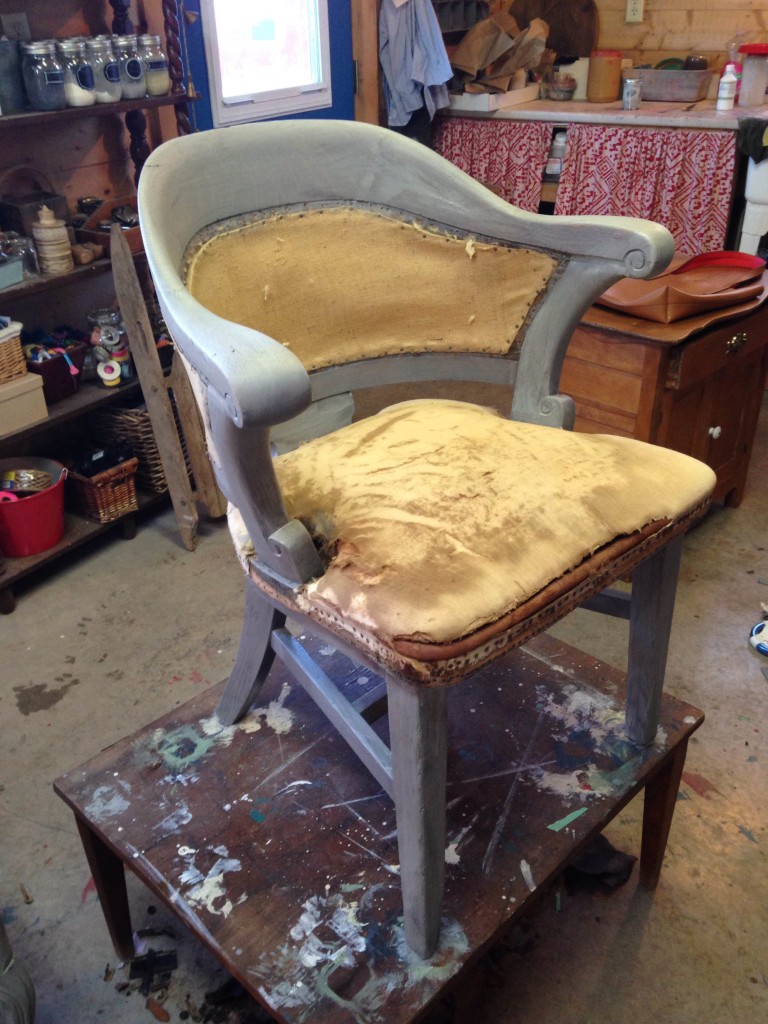
This was the picture I received from her….I love a perfect before picture – blurry, dusty….really sets the scene for vast improvement!

chair makeover

The plan for the chair involved matching paint to a table I had painted, up-cycling my old curtain panels and more tacks.  And no chippy paint.  🙂

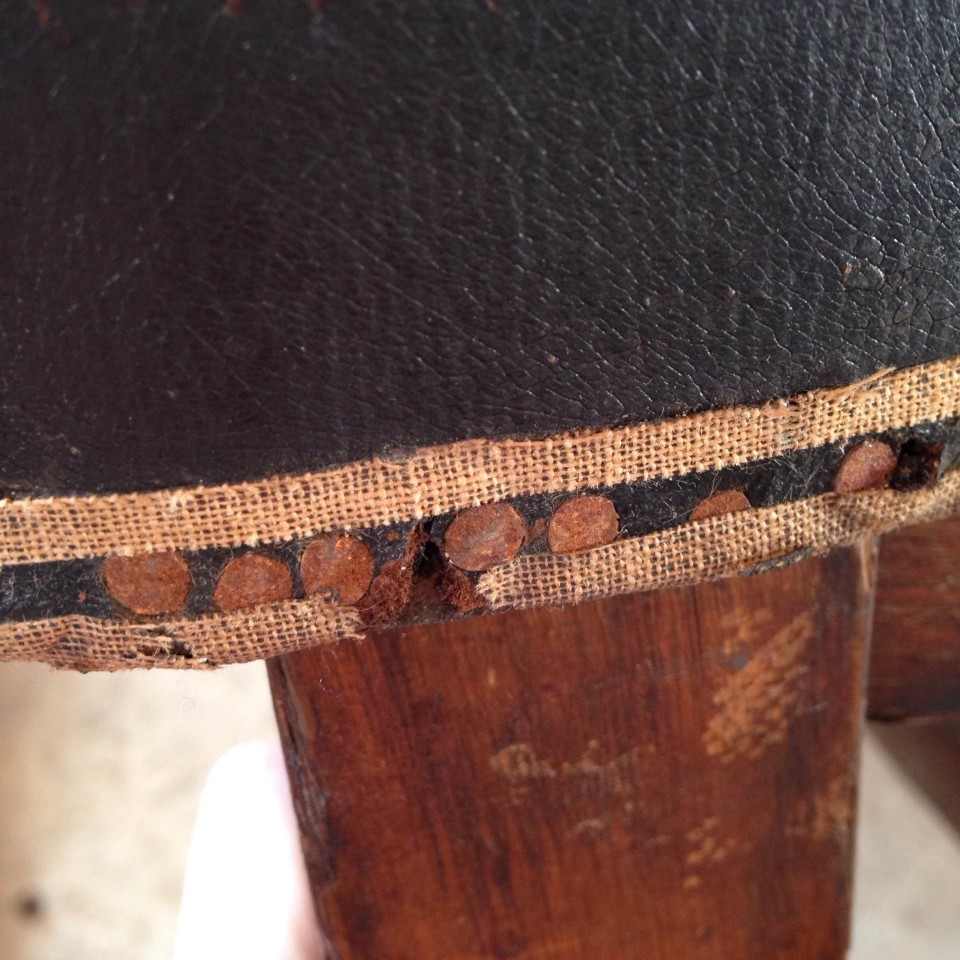
The most tedious task on this was removing all the tacks.  First all the decorative tacks and then all the tiny upholstery tacks under the decorative tacks.  And the leather was so old and brittle that it wasn’t even as if I could use it to help the process!

chair makeover

So.many.tiny.tacks.

But once it was all stripped down, it felt like huge progress!  The seat was in pretty good shape but I wanted to make sure it stayed that way so I re-enforced the bottom with rows of webbing, just to add some support to the springs.

Then I sanded, and sanded some more.  With old finishes, you just never really know how the milk paint is going to adhere.  So a good sanding and the addition of Bonding Agent made me feel a little more reassured that the paint would stick. The first coat always looks so bad!  But two additional coats gave a nice even finish.  A quick sand to remove any rough spots was all I did after it was dry.  Then a final coat of hemp oil and the wood was all set.

chair makeover

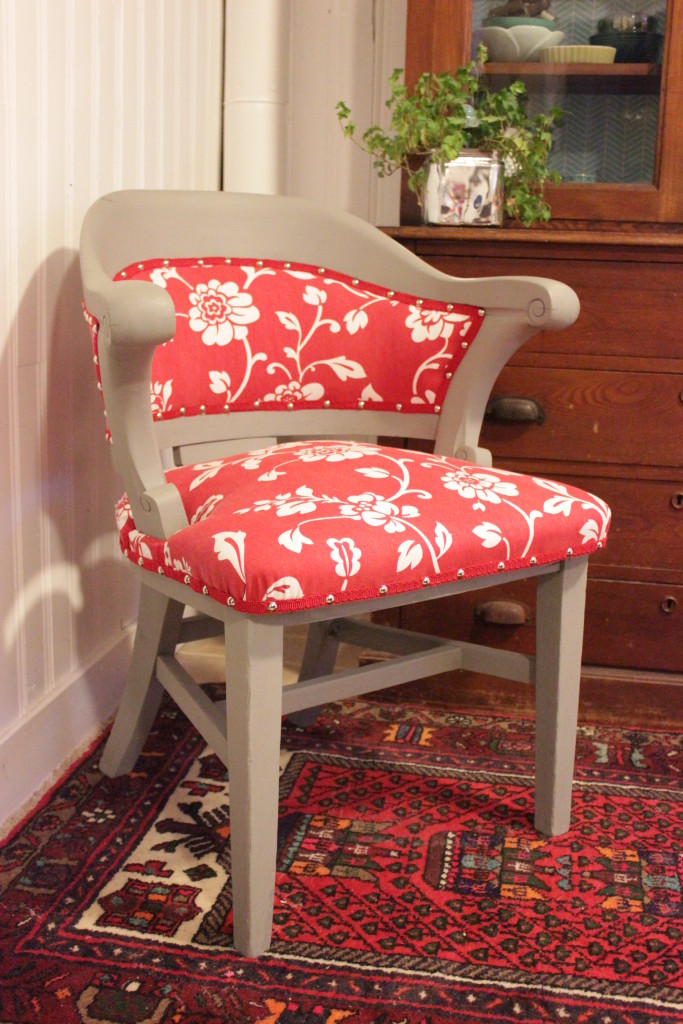
I started upholstering on the outside back, it was the easiest surface to start with and it would give me a feel for how the rest of the upholstery would go.  It looked pretty good, so I carried on to the inside back.  The inside curve can be a tricky thing to upholster.  The fabric tends to want to crease but I managed to get it laying very flat.  { Sidenote – thankfully the fabric was an all over floral and not geometric – so much more forgiving!! }  Then I added the gimp and silver tacks to finish that section off.

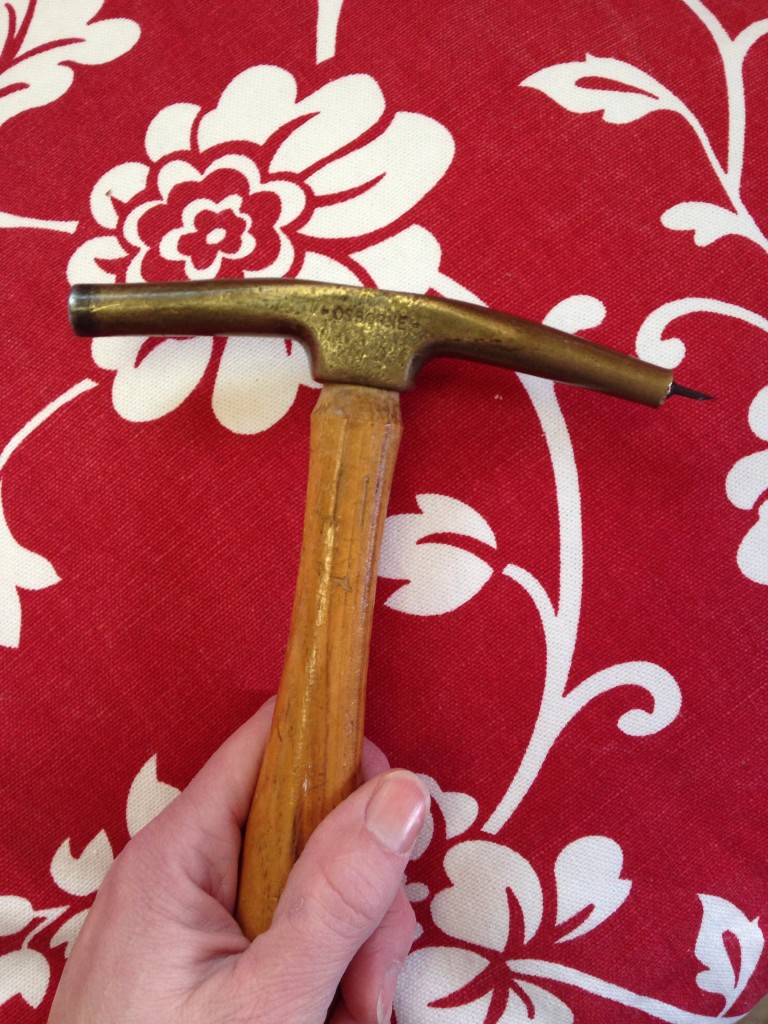
This is where I hit a snag.  The seat.  Oh dear.  My  regular hammer and my staple gun wouldn’t fit down between the paddings and the piece of wood along the back.  I was at a stand still.  I don’t own an upholstery hammer, nor do most people.  And I don’t think anyone in Pictou County even sells them.  Halifax was the closest place that I could source one.  I put a plea out on Facebook and my old working buddy, Mark, whom I watched and learned from for years, replied that he had one with 30 years experience that I was able to borrow!!  Mark saved the day!!!

chair makeover

Once I had the right tools for the job, it was so easy to do what I needed to do!  And after using his hammer, I definitely need to purchase one!  What a difference in working with a hammer made for a specific job as opposed to a regular old hardware store hammer.

Once the chair was completed, I took it in the house to photograph, the studio is in such a state!!  It needs a seriously thorough cleaning!

chair makeover

chair makeover


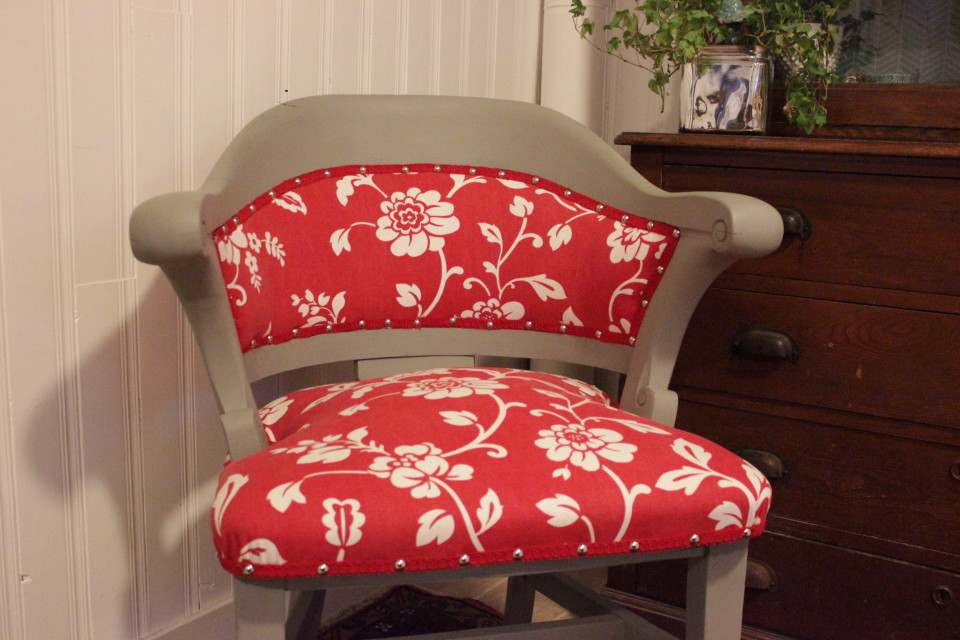
Ta-da!!!!  Hardly even looks like the same chair!!  I’m so pleased with how it turned out.  I love being handed a challenge and stepping up to it.  It is so satisfying to be able to say I did this.  I took bits and pieces I’ve learned over the years and putting the skills I didn’t know I had to use and coming out on the other end pleased with what I accomplished.

To those of you who put your trust in me with your projects, I thank you from the bottom of my heart.  I know that there is a huge amount of trust that happens when I put your piece of furniture in my car and drive away or I add your project to the list in the studio.  And I appreciate that you do it.  You are helping me learn, expand my skill set and increase my confidence in the studio.  Don’t get me wrong, I love it, I know that my God-giving gifts are being used and nurtured here.  And I’m so happy that I get to take on projects like this and call it my job!

Now, I’m off to deliver this chair!

To be continued,

Lori

In Makeover

Tarnished No More


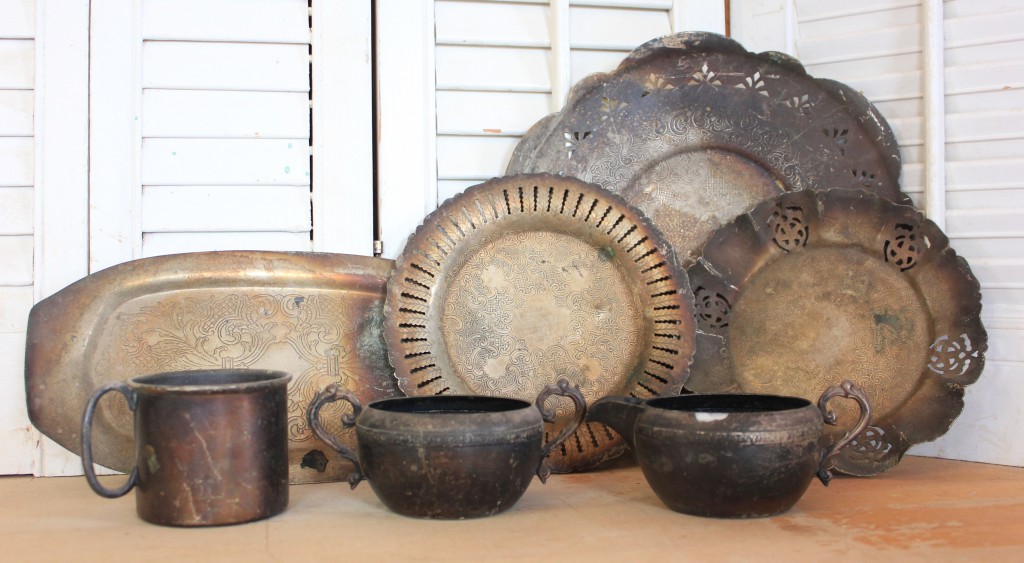
Amazing the things you can learn on your friend’s Facebook page!!  What exactly do I mean??  Well, Trudy { aka The Best Aunt Ever } posted that she had cleaned some old family silver.  I was curious.  I had been gifted some silver pieces that had been hanging out in an old barn for awhile and I would love to see them with a bit of shine….as you can see, no shine there….

silver

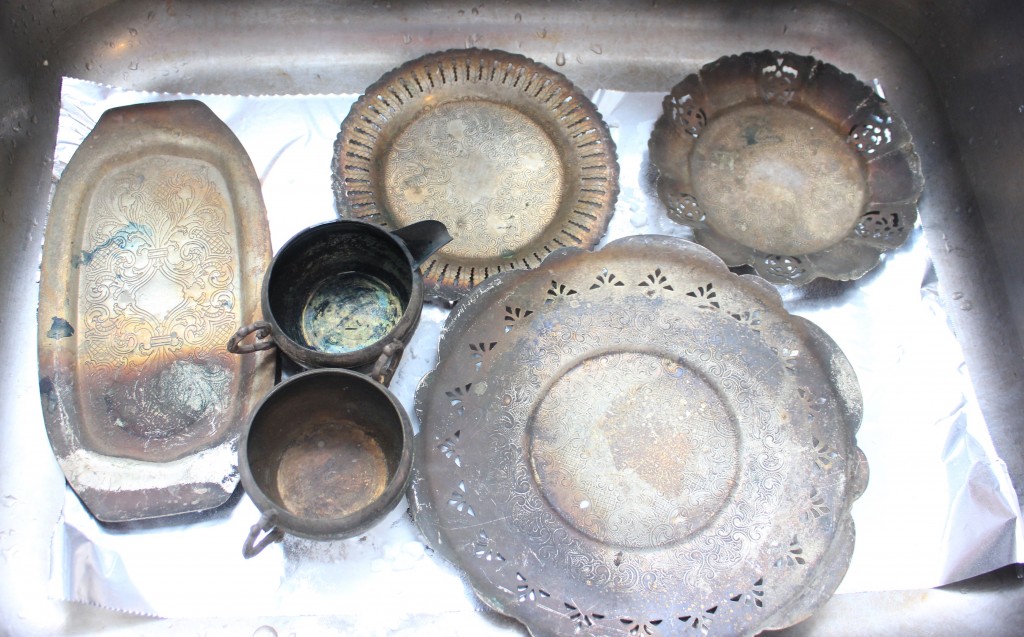
Thankfully, Trudy posted some instructions for those of us who never shine silver.  Seemed easy, all stuff I had at home { which I love when the idea to do something strikes me } so I gathered up the pieces and took them to the house.

Step 1. Get some water boiling.

Step 2. Line the sink with aluminum foil

Step 3. Add some Baking Soda

Step 4. Lay in your pieces

Step 5. Pour the boiling water over it all

silver

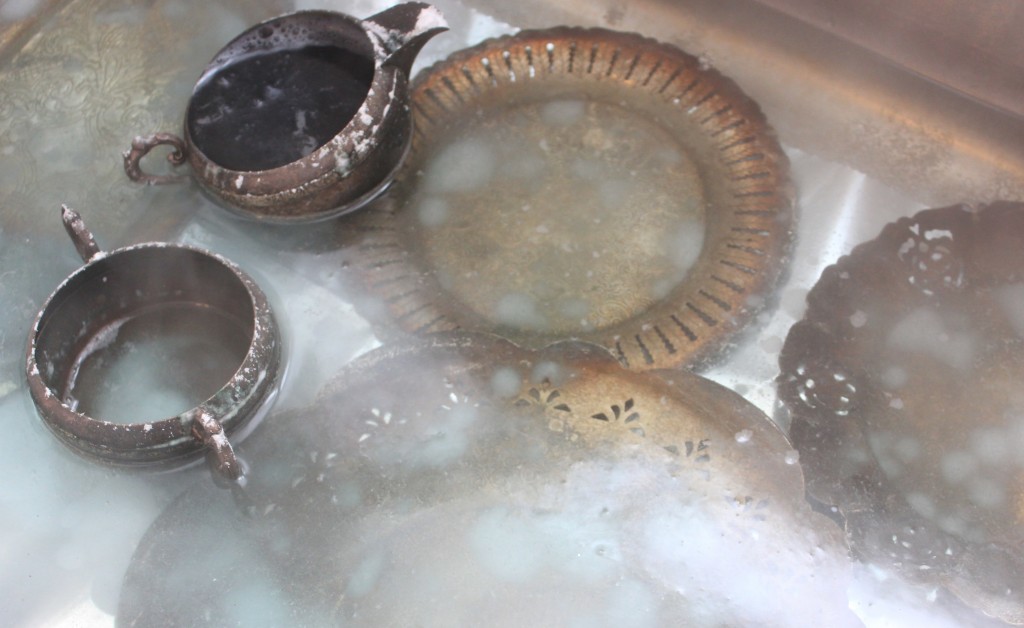
I’m going to interject here and tell you what happened for me.  It looked like nothing happened.  It smelled bad.  But I saw nothing change.  And the water was HOT, so it wasn’t like I was going to stick my hand in.  So, I sprinkled on MORE Baking Soda.  And….

silver

It started hissing and bubbling!  Like magic!

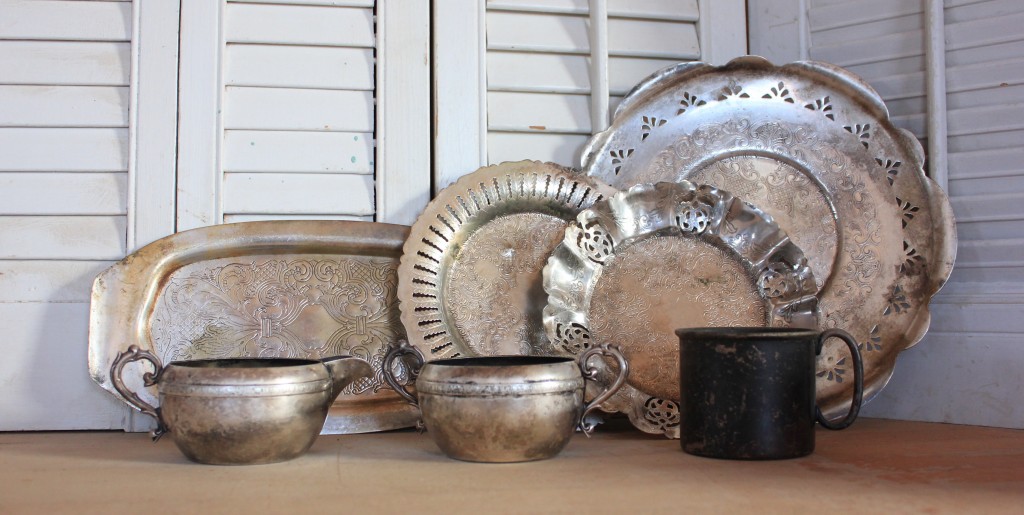
I let the water cool a bit more and finally grabbed an exposed corner of a plate and pulled it out.  The tarnish was rubbing off!  I grabbed a cloth and rubbed more.  There was still some really heavily tarnished areas so I sprinkled on some baking soda and just rubbed with my fingers.  Magic, folks…..unbelievable!!  I worked away at all the pieces with more baking soda and my hands.  I’m so impressed.  I never thought these dirty, tarnished pieces would – COULD ever shine again! As a sidenote, my hands don’t look so ‘shiny’….the tarnish is embedded in the cracks and grooves of my hands now….but its fine, it matches the paint 🙂

silver

They are by no means perfect.  But, if memory serves me correctly, I think they may have been through a house fire { Wendy? Am I right on that? }  Regardless, they look 100% better than they did this morning! I left the little cup so you could see the difference, side by side.  Amazing, no?

I loved them before, they made great pieces to display little things at markets.  But, I think I’ve just grown more attached to them!

So, what do you think?  Would you try it?  Did you already know all this?  What shiny pieces of silver did you fall for?

To be continued,

Lori


In Clear Day Farm/ Decorating/ Makeover

Cabinet Makeover

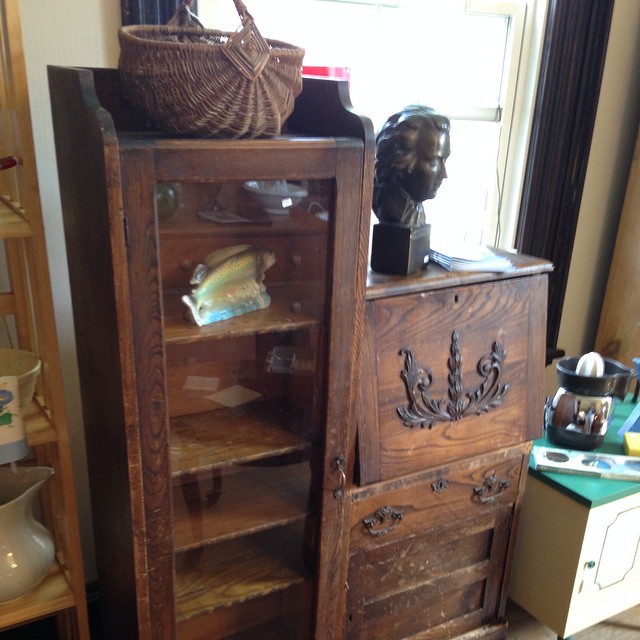
Anyone remember that we bought this cabinet this summer? I happened upon on the Facebook page for Babbling Brook in Truro and it seemed perfect for our living room.  I sent a picture to the handsome Mr.Byrne while he was away for work and he agreed that it was just right.  So I took it home and moved it in.  And there it sat in its unloved state….in the corner of our living room until it was time to put up the Christmas tree.
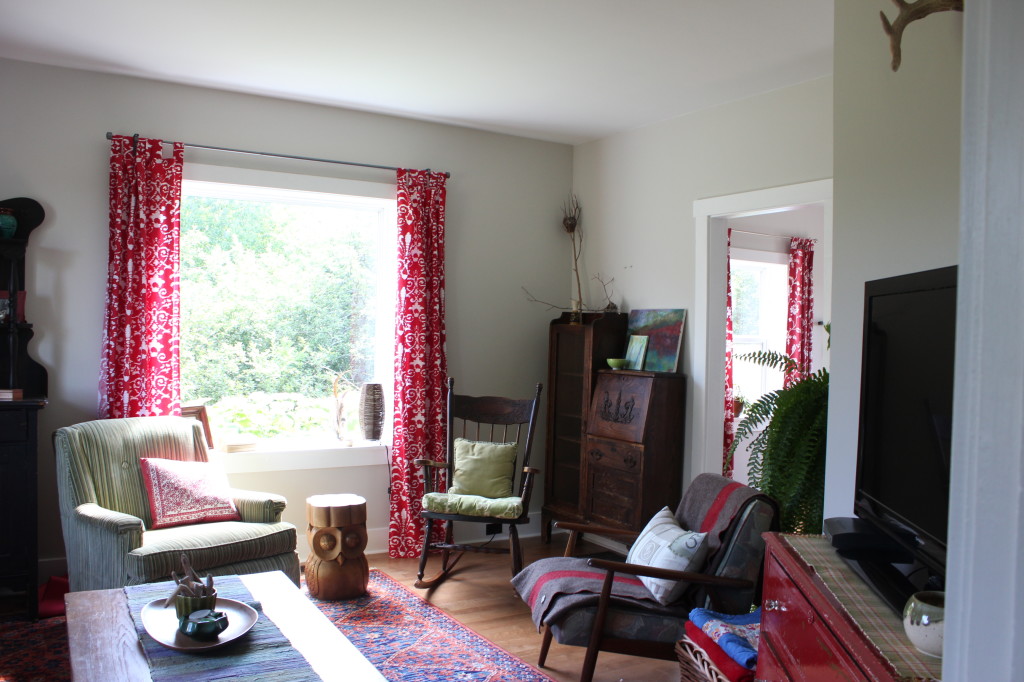
house july 2105

It had gathered a collection of bits and bobs, nothing too planned or well curated while it sat in the living room.  I had planned on painting it at any moment….but of course, I hadn’t done it by the time we moved it to the studio for the holidays.

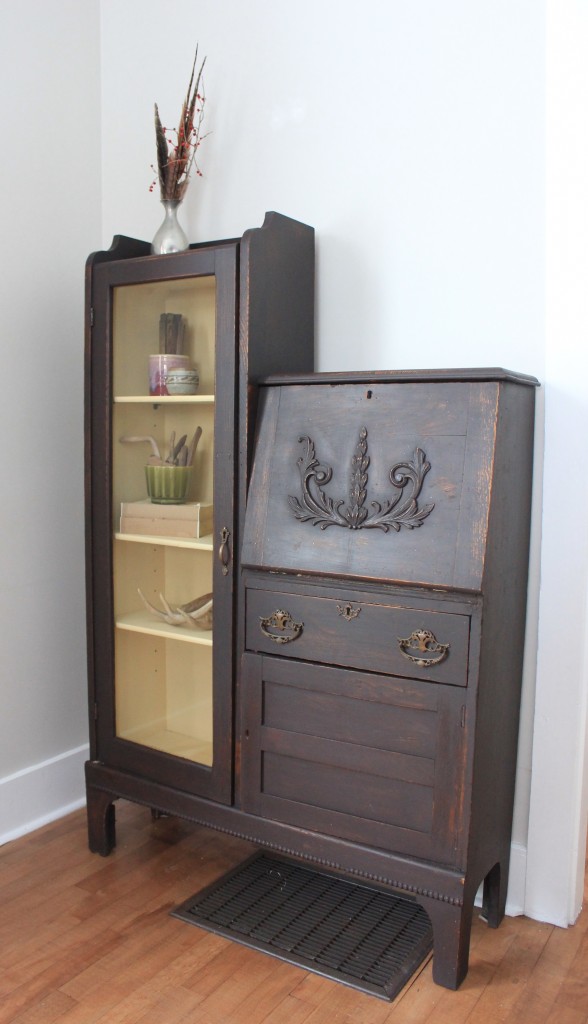
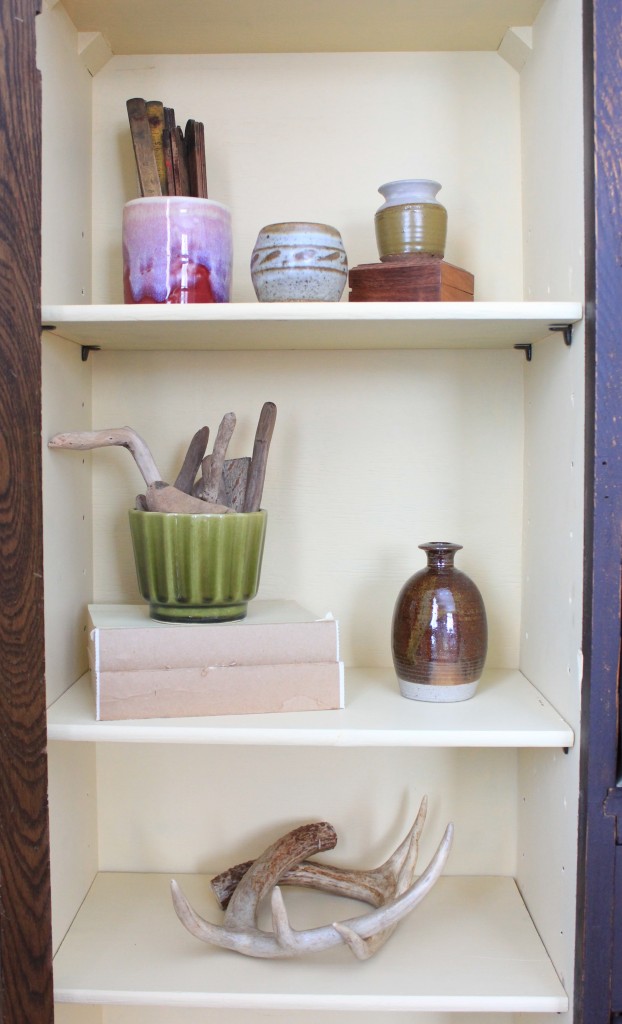
We had lots of debate over how it should be painted.  White? Gray? A colour? In the end, we both decided that we wanted it to tie in with the other cabinet we’ve got in the living room that we got in Great Village.  I knew I needed to have a blackish brown colour that looked kind of like an aged finish. Preferably with some grain showing through.  I also knew I wanted to keep the hardware….sometimes finding hardware that all coordinates on a piece like this can be tricky. I also knew I wanted the inside to contrast so whatever I put in it would stand out and not disappear.  I did accomplish that at some point during the fall.  The interior of the shelf section and the secretary got painted with Fusion Mineral paint in Buttermilk Cream.

So, my goal was to have it painted and ready to move back in when the tree came down.  And then some other custom projects came in and it was Christmas and the girls were around and the quarters in the studio were getting pretty tight.  So, nothing happened.  At all.  Until the needles starting dropping from the tree and I knew it was time.

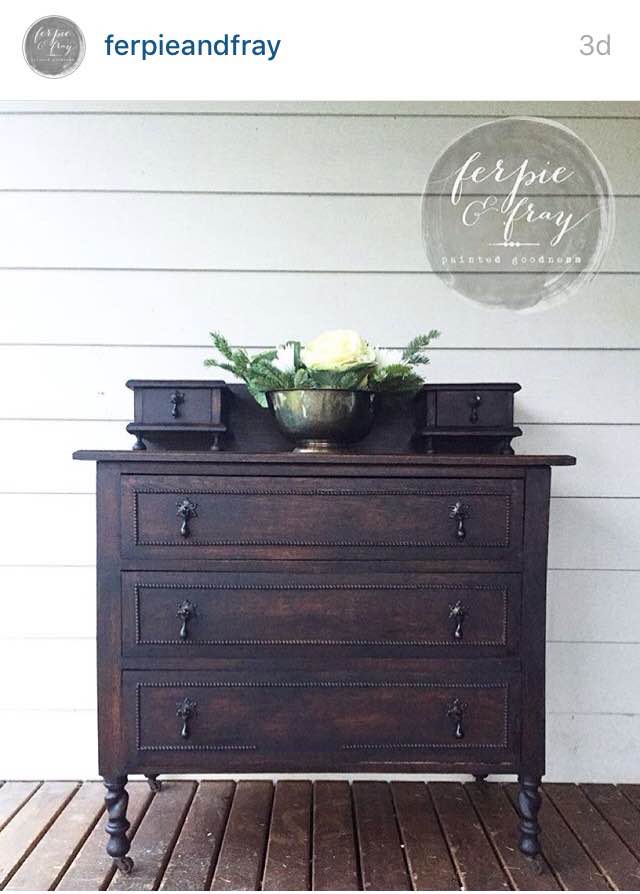
I head to the studio, get out my Miss Mustard Seed Milk Paint in Typewriter and Curio and realize I have very little Typewriter left….oh dear.  I make my special mix and put a coat on the cabinet.  Ugh.  I think the second coat will need to be blacker.  An unexpected trip to Truro to Onlsow Historic Lumber was in order. Scroll through Instagram as the paint dries….and viola…the perfect picture of what I’m trying to achieve!  ferpie&fray

See???  Isn’t it awesome???  This Instagram feed has some great painted furniture, if you are into that sort of thing….which I obviously am!

No trip to Truro required, much to Michael’s dismay, we had talked about a date lunch at Hub Grub! I did up the drawer as a test and took it in to compare it to the other cabinet.  And we both loved it.  I also checked with Catherine, as her taste is pretty darn good, look who she has for a friend! 😉

Since it passed the test, I sanded and sanded that thing and then I oiled it with Miss Mustard Seed Hemp Oil, which is my favourite finish ever! We brought it back into the house that day.  Another benefit of using non-toxic products like Miss Mustard Seed!

cabinet

I tried to style it, but I didn’t feel the huge urge to dig out a bunch of stuff and play that day so I played a bit and called it quits.  It’ll do for now, I know it’s one of those things that will change and evolve.  I’m debating whether I should put some of my favourite decorating books on the bottom shelf, if they’ll fit.  I’d like to have them handy and prettily displayed, instead of stuck on the shelf in the office, where no one sees them.

cabinet

There you have it, a great little cabinet, tucked into the corner of our living room, now with a fresh, richer look.  The power of paint always amazes me!

To be continued,

Lori

In Clear Day Farm/ Decorating/ Makeover

Hallway Gallery Wall

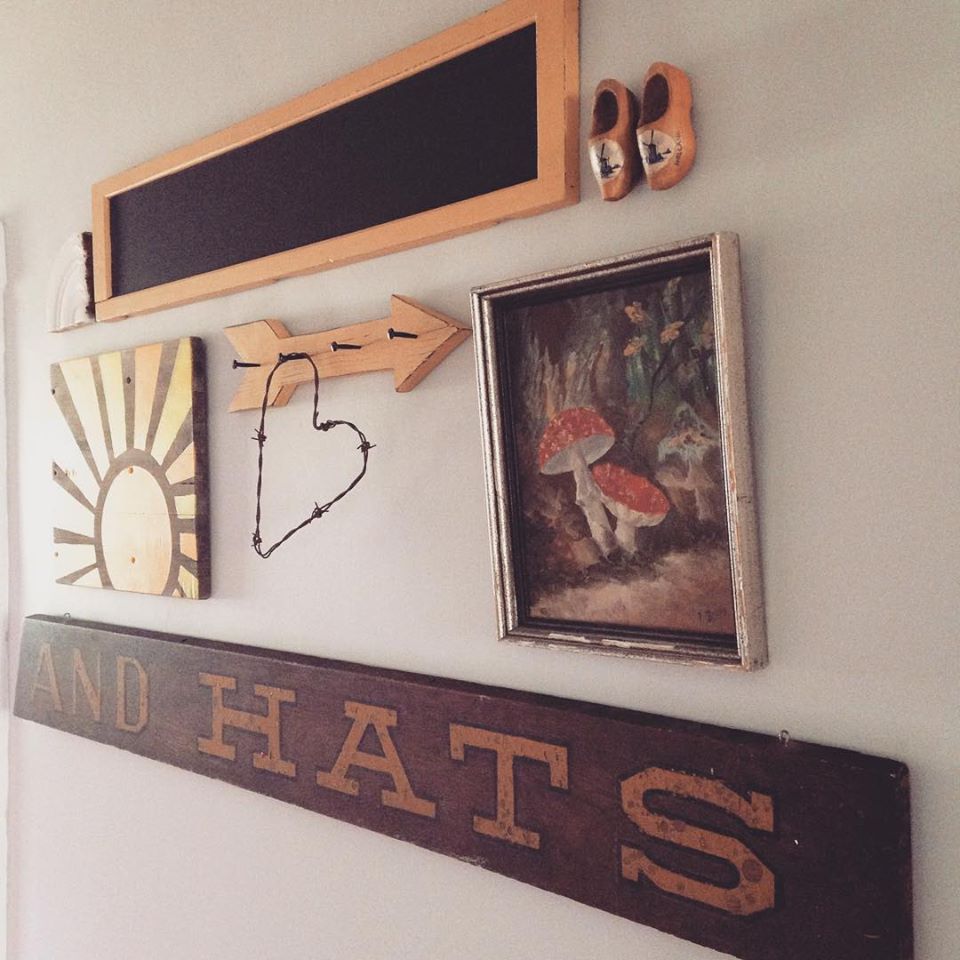
gallery wall

A week or so ago, I posted this picture of my hallway on Instagram and on the FB page.  It is my completed gallery wall in the hallway of the main floor.  I was excited to have it finished finally!  It wasn’t what I had originally planned, but isn’t that the way it always goes?  And if I was starting it all over, I would lay it out differently but I guess that’s what happens when the plan changes part way through.

But I wanted to share a few of the stories behind the reason these things are special enough to make it onto the gallery wall.

gallery wall

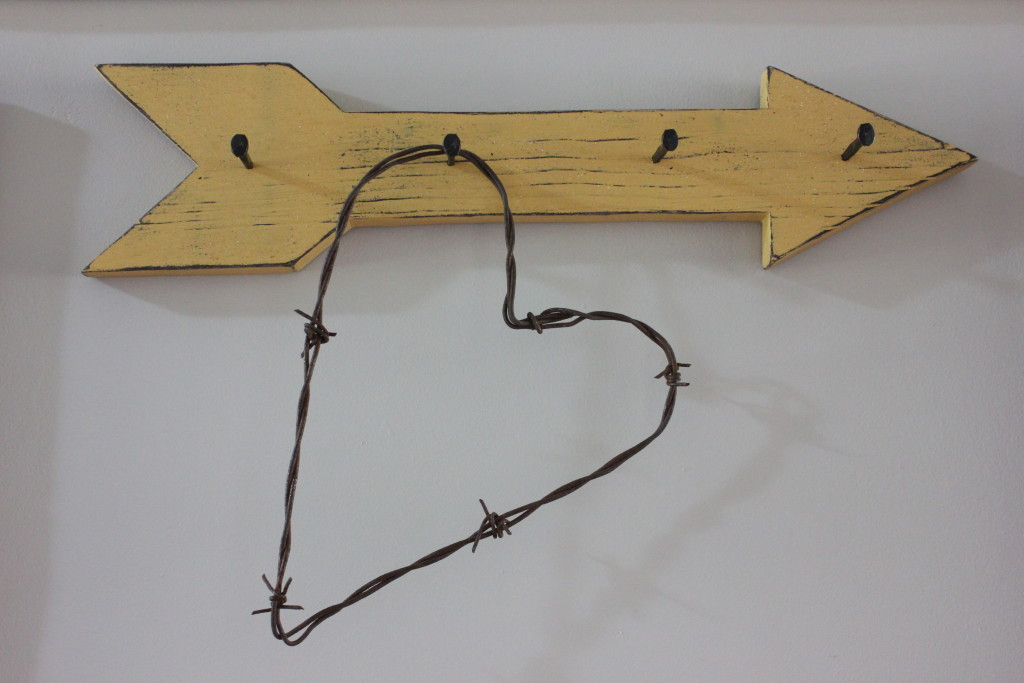
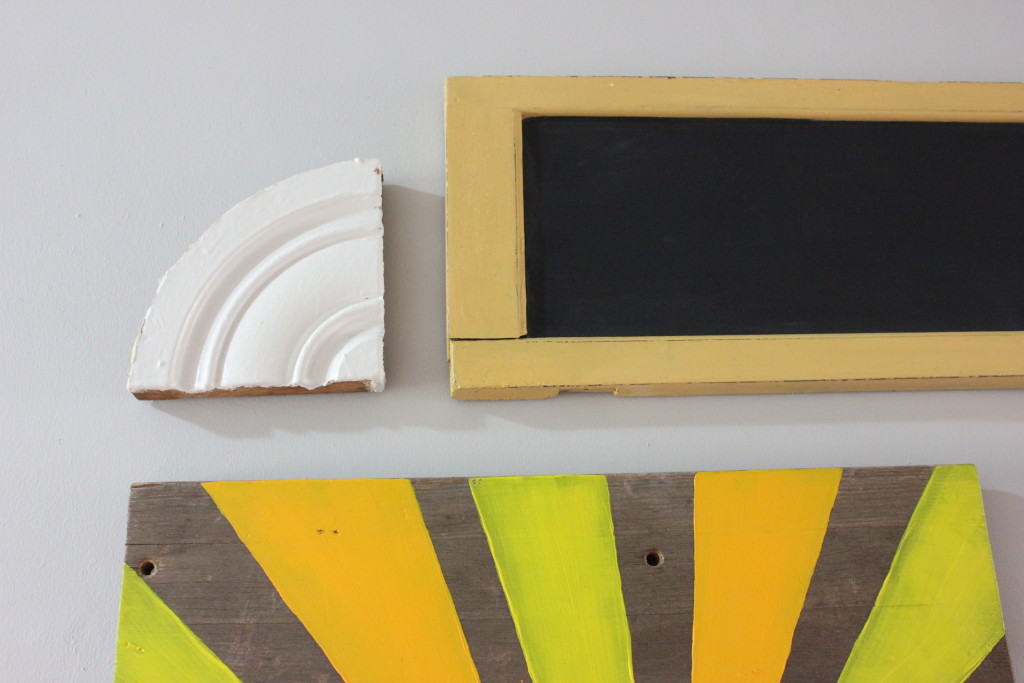
A few of the items are things that I’ve milk painted, such as the arrow that I painted during the Milk Paint Workshop I did with Rose and the chalkboard { which is still blank…. } from an old shutter panel I scored at Onslow Historic Lumber.  Off the arrow hangs a heart made out of barbed wire that I bought years ago from who knows where, but I still love it.

gallery wall

There’s also a piece of old moulding that I found during my trip to ‘The Barn’ with Rose, it’s found a spot rounding out the top left corner.  I love that little piece of moulding, it even has some old wallpaper on the side of it and I mean proper old wallpaper, that is made from, gasp, PAPER!

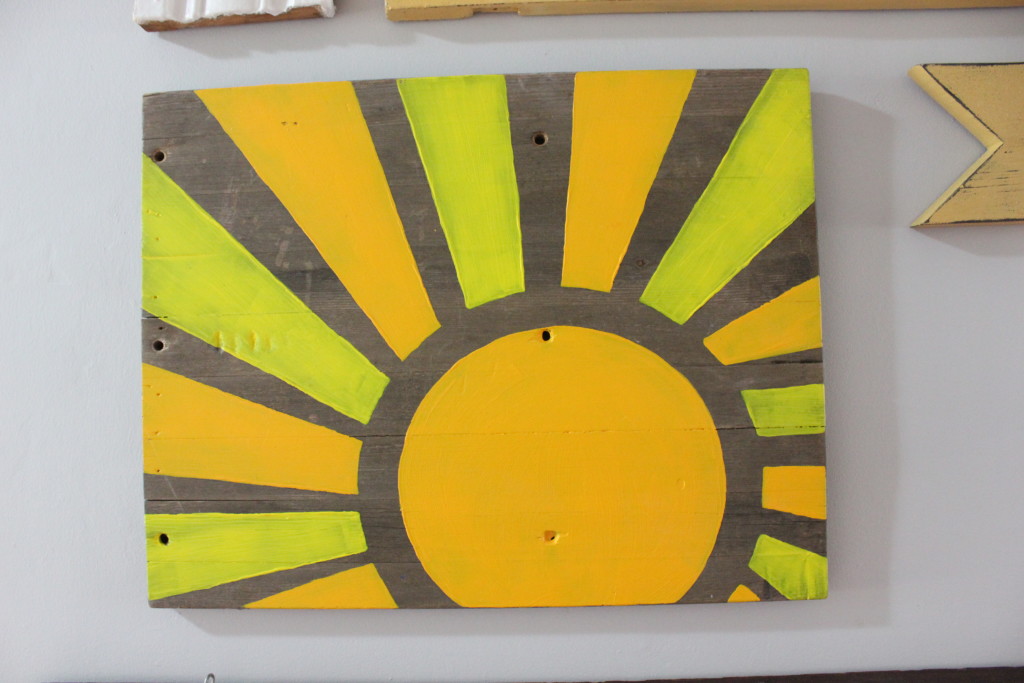
The sunshine painting I bought last November during the Olde Foundry Market I organized in Pictou.  It was painted by my friend who owns Melrose & Pistachio and I love the way it brightens up the hallway.

gallery wall

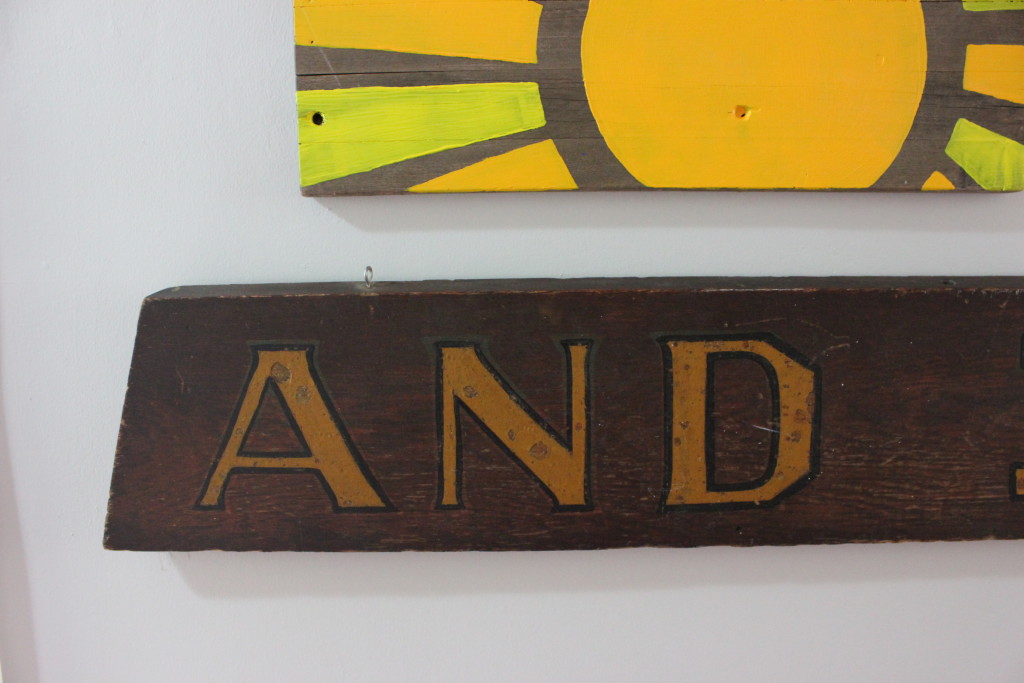
Then there is the last piece that found its way onto the collection – the ‘AND HATS’ sign.  This thing is the real deal.  If you are from the area and have lived here for while, then you will probably remember the store in Truro called Margolians.  This sign, at some point, hung in that store.  How did I get it? Well, I work one day a week in a shop called Above & Beyond Home Decor and that shop is in part of the old Margolians building. This sign was in their storage space and they decided to pass it on to me.  Anne and Liz know about my fondness for old things!  The handlettering is so cool!  And the colours are perfect for my hallway.  I love that the board isn’t cut straight, just adds that extra character. My plan was to string some kind of wire to hang the girls art work from but when this made its appearance, I knew it was perfect!

gallery wall

The wooden shoes reflect my Dutch lineage and I found them in an antique shop in Cape Breton during a trip to see Janice.  These are exceptional to me, simply for the fact they are painted to look like Delft Blue.  I’ve seen quite a few pairs of wooden shoes over the years, but these are the only wooden ones I’ve seen painted in this manner.

gallery wall

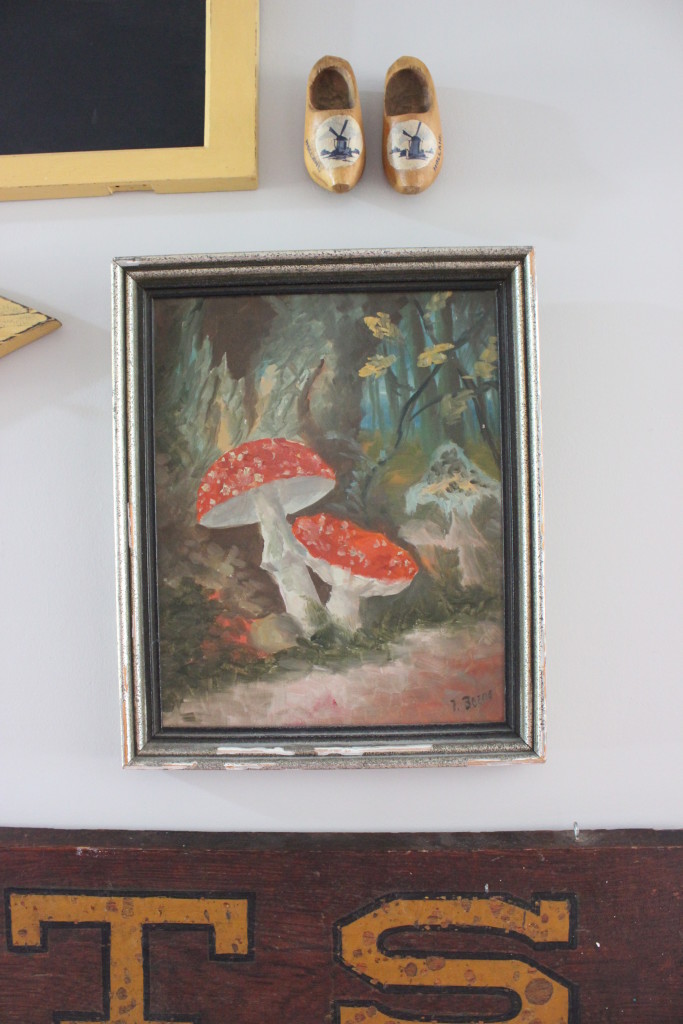
The last piece that is part of this gallery wall is the mushroom painting.  This is an extra special piece of artwork because it belonged to my grandmother, Lena, whom my Lena is named after.  This painting was apparently given to my grandmother by her art teacher.  I don’t really know anymore details than that, but I wish I did.  I’ve tried to research the name on the piece but without any success.  I believe it would’ve been before Grandma immigrated to Canada, but I think I may just be assuming that…  I love the story behind the painting, but I also love the painting itself – the colours, the subject….yep, I’ve very happy to have it and I display it with pride.

So that sums up the gallery wall tour.  I hope you enjoyed it.  I know that this wall is not perfect nor is suited for everyone but for me, it’s the perfect way to wrap up the hallway project.  I’d also like to mention how difficult it is to try to photograph this wall!! I’ve tried different angles, different spots but nothing is ever quite right!

Now tell me, do you have a gallery wall in your house?  I’d love to see pictures and hear all about it!

To be continued,

Lori

PS You can see the post about the hallway when it first got painted HERE